

Shooting Hand Surgery Video
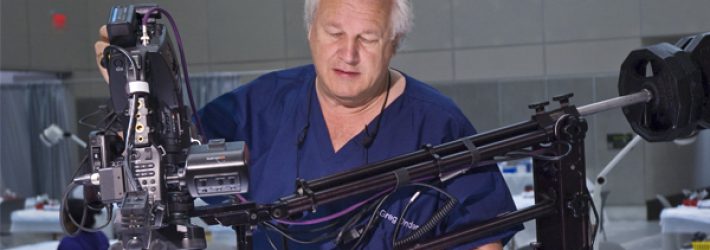
A Surgical Videographer’s Technique for Capturing the Upper Extremity
During my years as a surgical tech, hand surgery was one of my favorites to scrub in on. It was not just because you get to sit during the case, but I loved the visibility, the close to microscopic intricacy of the work, and the resiliency of the hand. We were helping those who suffered an injury or problem with the main tool that we as human beings have at our disposal at all times. The human hand is vastly important to everyone, and oh how we sometimes take it for granted. I sit here now using both of my hands, yet I don’t even have my mind on them. Incredible!
Shooting Live Surgical Video of the Hand
I recently came off the heels of shooting live cadaveric surgical demos of the hand and upper extremity at ASSH in Austin, Texas. Tabletop cadaveric surgical video can be shot using an array of approaches. No single method is best for all scenarios. I have learned this lesson a number of times and whenever I work with first-time clients, I typically bring all of my camera rigs so I can adapt quickly and shift over to a better capture technique if necessary. Case in point—hand surgery!
You would think that hand surgery could be served by a remotely controlled overhead jib arm with a pan/tilt head. This of course would make sense if the procedures were strictly palmar. But when it comes to the multiplicity of extremity positions and approaches hand surgeons actually use, a videographer has to adapt and reposition quickly.
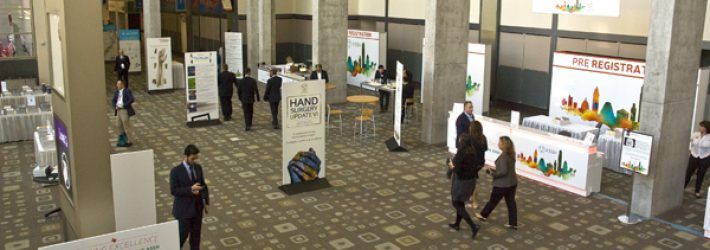
ASSH Annual Meeting
Originally I was asked by a large AV events company, the kind of company that specializes in providing sweeping audio/visual services for large conventions, to come on board and help with their clients, the American Society of Surgery of the Hand or ASSH. ASSH offers some of the most innovative surgical demos from some of the most experienced surgeons in the field. They needed spot-on live surgical video that could demonstrate microscopic detail, following each procedure with the alacrity of a human eye and the anticipation of knowing the procedure.
The cameramen that the AV company hired to shoot these demos were all good videographers in their own rank, but they neither had the right equipment for shooting surgery, nor did they actually know what they were looking at. So those cameramen mostly kept zoomed out to a medium shot for fear that they would miss something. And thus they lost detail. The surgeons would have to break away from looking at the wound then up to the monitor, and this would break up the presentations and became quite tiring for each presenter. Likewise the audience was missing visualizing the microscopic detail that hand surgeons need to see.
Then when I came on board I thought I would bring both a remote and manual jib arm, but begin with the overhead remote one.
A Technique Used at Current Issues in MRI & Sports Medicine
For many years I shot anatomic dissections for a seminar called Current Issues in MRI & Sports Medicine where I would actually put on my own gown and gloves myself and position and rotate the specimen for a camera that was fixed as an overhead. I would signal to the camera operator (my old partner, Bill Vogler) to zoom in or out with a glance. (The truth of the matter is that Bill had outstanding surgical sensibilities and I rarely had to indicate what I wanted him to do). This technique worked impeccably well, because I could obviate the problem of chasing someone else’s movements and surgeon heads getting in the shot. For the type of specimens we were working with: hips, knees, elbows, ankles, and hands, this camera configuration worked best. I thought I would first try this same technique at ASSH but be ready to jump over to a manual jib.
The Very First Surgical Demo at ASSH
I started by holding the specimen with a fixed overhead camera as I did at Current Issues, but within a minute I realized it was a mistake. The surgeon was wearing loops, those glasses that act like microscopes, and each movement that I made attempting to center the specimen for the camera would visually startle him. It was not working. And this was a palmar procedure besides, which is actually the more forgiving procedure to capture with a fixed camera.
Then a most amazing thing happened. In less than five minutes into the demo, a bulb blew out on that same camera-mounted light, what we call a “sun-gun.” Call it divine intervention, but I was forced to jump over to the manual jib to get the shot. It didn’t take long for me to realize that using a manual jib was the best scenario for cadaveric demos at a meeting like ASSH.
The Setup
There are a number of ways to shoot tabletop cadaveric dissections, but for ASSH I configure the dissection table at the front of the room, to the side of the podium, and opposite the screen where the audience will be viewing the demos.
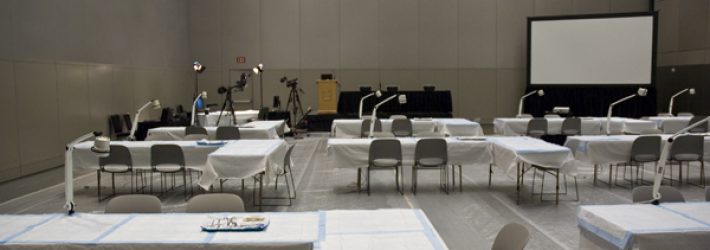
Surgical Skills Lab At ASSH 2016
Dissection tables are staggered throughout the room for attendees to have a go at their own dissections. But each educational module is started with a dissection demo by a teaching surgeon.
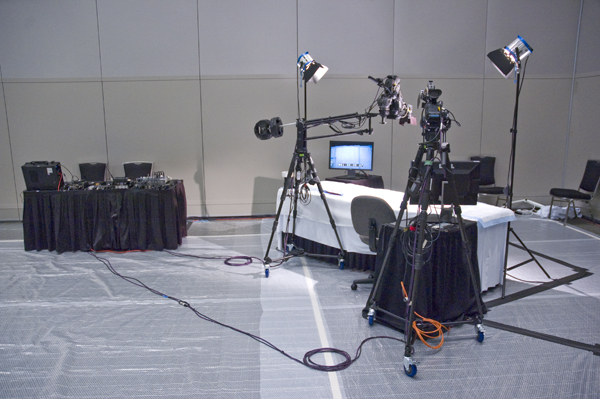
One Manual Jib & Second Camera On Tripod
Our first day was a demonstration of the many methods for applying flaps to traumatically exposed areas of the hand and arm. In order to capture the many techniques, I had to move the camera quickly. A manual jib is unquestionably the quickest way of relocating the shot.
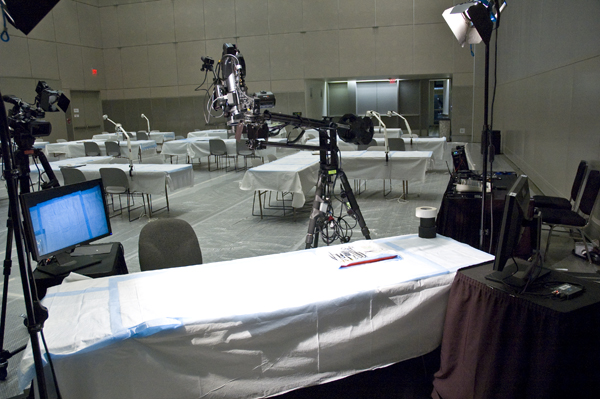
Monitors Facing Surgeon & Assistant Sides Of Dissection Table
Using the center of the table for dissection is best with two monitors facing the surgeon and assistant’s position so they can see the shot as they look up. And for those infrequent times that I need a shot from the other side of the table, a simple second camera on a tripod did the trick.
Another important technique is to always review the surgery with the surgeon beforehand, especially to determine if the extremity is to be rotated. I find that the best position for the camera is opposite that of the surgeon for most hand procedures, but not always. As we move up the wrist and especially with elbow surgery, it is actually better to position the camera on the same side as the surgeon, capturing his point of view. So in this setup I have the surgeon sit on the same side as my camera rather than move my gear to the opposite side.
I also like being able to see the big screen to determine if I am giving the wound proper exposure for the audience. Large screens can mismanage exposure compared to video monitors. Since the purpose of this gig is to teach surgeons, best optimize for the large screen.
Know What is Going On
As I’ve mentioned before, some kind of surgical background is an advantage. If you don’t know the procedures, it helps if you take the time to review the procedure with the surgeon before shooting. Live presentations are especially difficult because you cannot stop the surgeon. Having the ability to listen to the surgeon and understand the procedure in order to anticipate his next move is what makes live camerawork smooth and unstrained.

